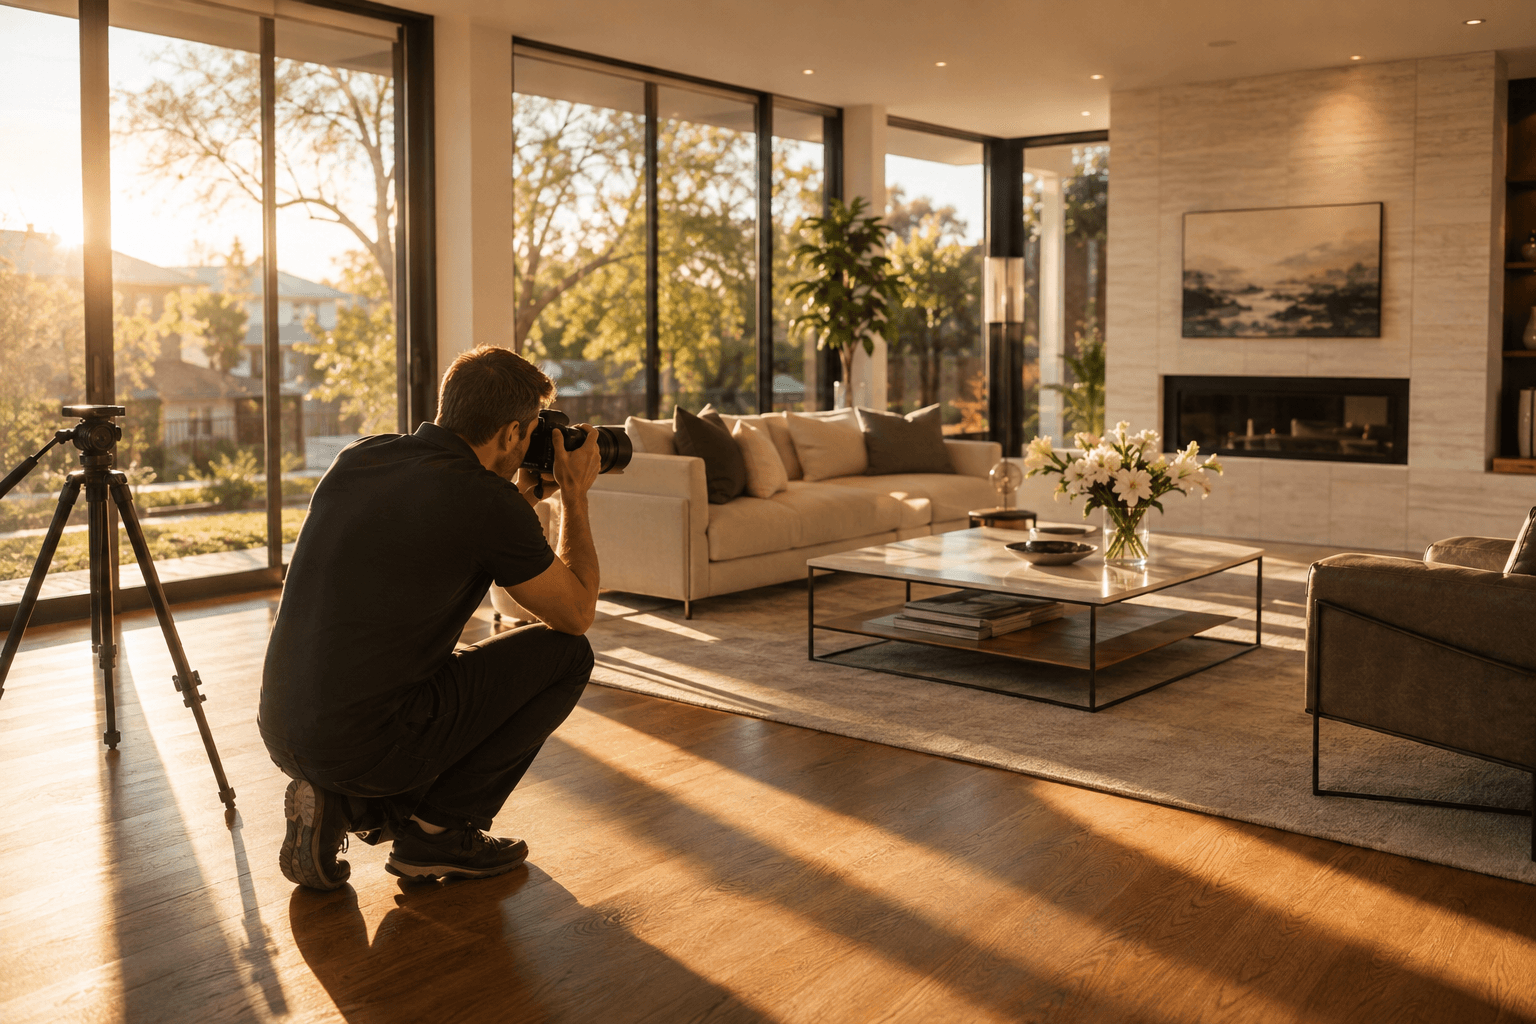
Real Estate Photography Tips: How to Make Your Listings Stand Out
Professional-quality listing photos don't require expensive gear. These photography tips help real estate agents capture better images that attract more buyers and sell homes faster.
Hailey JeonMarketer, vProp13 min read
TL;DR
Virtually every buyer starts their home search online, which means listing photos are doing the selling before an agent ever shakes a hand. Redfin's research backs this up directly: professionally photographed listings sell up to 32% faster than those shot on a phone, and tend to draw higher offers too.
The gap between amateur and professional results usually comes down to a short list of fixable habits, not expensive gear. Getting those basics right is one of the highest-leverage changes an agent can make per listing.
You already know that buyers start their home search online. Virtually every buyer uses the internet during their home search today, per NAR's ongoing buyer research. That means your listing photos are doing the heavy lifting before you ever shake a hand or open a front door.
And the numbers back this up. Redfin's own research found that professionally photographed listings sell up to 32% faster than those with amateur photos, and they tend to attract higher offers too. So if you're still pointing your phone at a dark living room and hoping for the best, it's costing you money.
This guide covers the real estate photography tips that actually move the needle. From equipment choices to editing, room-by-room strategies to common mistakes, you'll walk away knowing how to shoot listing photos that grab attention on the MLS and keep it.
Why Listing Photos Matter More Than Ever
The first showing happens on a screen. Buyers scroll through dozens of listings in minutes, and your photos decide whether they stop or keep going. A blurry exterior shot or a dimly lit kitchen can knock your listing out of the running before anyone reads the description.
Consider this: a VHT Studios analysis of over 25,000 listings found that homes with professional photos got 118% more online views than those shot on a phone. More views mean more showings. More showings mean faster sales and stronger offers. Your listing photos are, in a very real sense, your first open house.
Property photography also shapes how buyers perceive value. A well-photographed 1,500-square-foot home can feel spacious and inviting. A poorly photographed 2,500-square-foot home can feel cramped and forgettable. The camera doesn't just capture reality. It frames it.
If you want to take your listing visibility online even further, pairing strong photos with video walkthroughs creates a listing that's hard to scroll past. But photos are the foundation.
Hailey Jeon
Marketer, vProp
Hailey Jeon is a marketer at vProp, writing about real estate marketing, listing videos, and the tools agents use to win and market listings. Hailey's guides focus on practical steps agents can use on their very next listing.
Let's settle this debate. Can you take good real estate listing photos with a smartphone? Yes. Should you? It depends.
Modern smartphones, especially flagship models from Apple and Samsung, have made huge strides in computational photography. HDR processing, wide-angle lenses, and night mode features can produce surprisingly solid results. For agents just starting out or shooting lower-price-point properties, a smartphone can work.
But a DSLR or mirrorless camera with a wide-angle lens still wins in most situations. The reasons come down to a few things:
Dynamic range. Cameras handle high-contrast scenes (bright windows, dark interiors) better than phones.
Lens control. A 16-24mm wide-angle lens on a full-frame body captures rooms without the warped, fisheye look that phone ultra-wides sometimes produce.
Manual settings. You can control aperture, shutter speed, and ISO to adapt to tricky lighting conditions.
RAW files. Shooting in RAW gives you far more flexibility in post-processing than a compressed JPEG from your phone.
The Minimum Gear You Need
If you're investing in equipment, here's a practical starting kit:
A crop-sensor or full-frame DSLR/mirrorless camera (Canon, Nikon, Sony all have solid options under $1,000)
A wide-angle lens in the 10-18mm range (crop sensor) or 16-35mm range (full frame)
A sturdy tripod (non-negotiable for sharp images and consistent framing)
A remote shutter release or use the camera's timer
You don't need thousands of dollars in gear. A used Canon EOS Rebel with a 10-18mm lens and an Amazon basics tripod can produce results that blow away any phone shot, provided you know how to use them.
Lighting Techniques That Make or Break Your Shots
Lighting is probably the single biggest factor separating amateur listing photos from professional ones. Get the light right, and a modest home looks warm and inviting. Get it wrong, and even a luxury property looks dull.
Natural Light Is Your Best Friend
Open every blind. Pull back every curtain. Turn on every light in the house, yes, even during the day. The combination of natural and artificial light fills shadows and creates a warm, lived-in feel.
Shoot during the right time of day. Midday sun creates harsh shadows and blown-out windows. Early morning or late afternoon light (the "golden hour") is softer, warmer, and far more flattering. For exterior shots especially, golden hour can turn a standard property photo into something that stops a buyer mid-scroll.
HDR Photography
HDR (High Dynamic Range) photography is standard practice in real estate now. The technique involves taking multiple exposures of the same scene, one for shadows, one for midtones, one for highlights, and blending them together.
The result: you can see the view out the window AND the details in the room's darker corners. Without HDR, you're usually forced to choose one or the other.
Most real estate photographers shoot 3-5 bracketed exposures and merge them in software like Lightroom, Photomatix, or Enfuse. Some cameras even have built-in HDR modes that do a decent job.
A word of caution. Over-processed HDR looks unnatural. The goal is a photo that looks like what your eyes see when you stand in the room, not a surreal, hyper-saturated image. Subtlety is key.
When to Use Flash
Flash gets a bad reputation in real estate photography, but bounce flash (pointing your flash at the ceiling or a wall so the light reflects indirectly) can fill in shadows effectively, especially in rooms with limited natural light. Bathrooms and basements often benefit from a single bounce flash to lift the overall brightness.
Avoid direct, on-camera flash pointed straight at the room. It creates flat lighting, harsh shadows, and that telltale "snapshot" look that screams amateur.
Composition Rules for Real Estate Photos
Good composition separates a photo that gets a click from one that gets scrolled past. You don't need an art degree. A few simple principles go a long way.
Shoot from Corners and Doorways
Positioning yourself in a corner or doorway gives you the widest view of a room. Shoot at about chest height, not eye level, to keep vertical lines straight and show more of the floor and ceiling. This creates a sense of depth and space.
The Rule of Thirds (and When to Break It)
Place key elements, a fireplace, a kitchen island, a window with a view, along the lines that divide your frame into thirds. This creates visual balance without feeling static. That said, centered compositions work well for hallways, long rooms, and exterior front shots. Use the rule as a starting point, not a cage.
Keep Lines Straight
Tilted horizons and converging verticals make photos look sloppy. Use your tripod's built-in level, enable gridlines on your camera screen, and correct any remaining distortion in post-processing. Straight lines communicate professionalism.
Declutter Before You Shoot
This is part of the shoot, not something you do separately. Walk through every room before you pick up the camera. Remove personal items, clear countertops, hide trash cans, close toilet lids, make beds, and tuck away cords. A clean space photographs dramatically better than a cluttered one.
For vacant properties, virtual staging for vacant listings can add furniture and decor digitally, turning empty rooms into spaces buyers can picture themselves living in.
Room-by-Room Shooting Guide
Not every room needs the same approach. Here's what to focus on for the shots that matter most.
Exterior and Curb Appeal
The exterior photo is typically the first image in your listing. Shoot from across the street or at least far enough back to capture the full front of the home, including some sky and landscaping.
Shoot during golden hour for warm, inviting tones.
Wait for cars to move out of the driveway if possible.
Mow the lawn, blow the walkway, and turn on porch lights.
Include the garage and front yard. Buyers want to see the full picture.
In spring and summer, green grass and blooming flowers add color naturally. In winter, a fresh snowfall can look beautiful, but overcast skies tend to make homes look gloomy. Pick your day carefully.
Kitchen
Kitchens sell homes. Stage the counters with minimal, tasteful items: a bowl of fruit, a small vase, a cookbook. Remove everything else. Clear the fridge of magnets and papers.
Shoot from the doorway or a corner to capture as much of the space as possible. If the kitchen has an island, position yourself so the island leads the viewer's eye toward the back wall. Make sure under-cabinet lights and pendant lights are all on.
Living Room and Family Room
Focus on showing the room's size and flow. Shoot from a corner at chest height. If there's a fireplace, make it a focal point. Remove personal photos from mantels and shelves.
Fluff pillows, straighten furniture, and add a throw blanket for warmth. Small touches make a big difference in photos.
Bathrooms
Bathrooms are tricky because they're small and reflective. Use bounce flash to fill in light. Close the toilet lid. Remove all personal items, including shampoo bottles, toothbrushes, and towels (then add one or two folded, clean towels for staging).
Check the mirror carefully before shooting. You don't want to catch your own reflection, or worse, your camera on a tripod staring back at the viewer.
Backyard and Outdoor Spaces
If the home has a deck, patio, pool, or garden, these deserve dedicated shots. Golden hour light works beautifully for outdoor spaces.
Stage outdoor areas the way you'd stage indoor rooms. Set the patio table with plates and glasses. Add a few cushions to chairs. If there's a fire pit, consider shooting at dusk with the fire lit for a dramatic, aspirational shot.
Editing Basics: Enhance, Don't Fabricate
Post-processing is where good photos become great ones. But restraint matters. Buyers will visit the home eventually, and if the photos look nothing like reality, you've damaged trust.
Essential Edits
Brightness and exposure. Lift shadows, bring down highlights. The goal is even, pleasant light across the frame.
White balance. Correct any color casts. Warm tones feel inviting, but too warm looks yellow. Too cool looks clinical.
Perspective correction. Fix converging verticals (walls that lean inward) using lens correction tools in Lightroom or similar software.
Cropping. Remove distracting edges. Tighten the composition if needed.
Minor cleanup. Remove a wall outlet or a stray cord in Photoshop if it distracts from the space. Don't remove structural features or mislead about the property's condition.
What Not to Do
Don't replace skies with dramatic sunsets. It looks fake and erodes buyer confidence.
Don't remove permanent features like power lines, neighboring homes, or structural elements. That crosses the line from enhancement to misrepresentation.
There's a simple test: if a buyer walks into the home and says "this looks just like the photos," you've done your job. If they say "this doesn't look anything like the photos," you've created a problem.
Common Mistakes Agents Make with Listing Photos
Even agents who care about photography fall into patterns that hurt their listings. Here are the ones to watch for.
Shooting too few photos. MLS listings with 20-30 photos outperform those with 5-10. Cover every room, multiple angles of key spaces, and all exterior sides. Buyers want to explore the home digitally before booking a showing.
Using vertical (portrait) orientation. Real estate photos should almost always be horizontal (landscape). Vertical photos waste space on MLS grids, cut off room context, and look unprofessional in listing presentations.
Ignoring the weather. A gorgeous home photographed under gray, overcast skies loses its curb appeal. If you can wait a day or two for better weather, do it. The exterior shot sets the tone for the entire listing.
Shooting during peak daylight. Noon sun creates harsh contrasts and deep shadows. Schedule your shoots for early morning or late afternoon when light is diffused and warm.
Skipping the tripod. Handheld shots introduce camera shake, inconsistent framing, and slightly tilted horizons. A tripod takes 30 seconds to set up and improves every single photo.
Not reviewing photos on a full screen before uploading. Photos that look fine on your camera's tiny LCD might reveal problems on a laptop screen: soft focus, cluttered backgrounds, visible fingerprints on mirrors. Always review on a larger display before submitting to the MLS.
For agents on a tight budget, strong photography is one of the best low-cost marketing ideas out there. You don't need to hire a $500-per-shoot photographer for every listing. Learning the basics yourself pays dividends across your entire business.
From Photos to Video: The Next Step
Great listing photos are the foundation, but video is where real estate marketing is headed. Buyers increasingly expect video walkthroughs, and listings with video are widely reported to draw dramatically more inquiries than photo-only listings.
The good news: if you've already mastered real estate photography, the transition to video is shorter than you might think. Many of the same principles apply. Good lighting, clean composition, decluttered spaces, and thoughtful staging all carry over.
You can start with simple walkthrough videos shot on your phone. A slow, steady walk through each room, with natural narration or text overlays, gives buyers a sense of flow and space that photos alone can't provide. Our real estate video marketing guide covers the full process from planning to posting.
Tools like vProp are making video creation faster and more accessible for agents. You can turn your existing listing photos into polished video content without hiring a videographer, which is especially useful if you want to sell homes faster with video but don't have the time or budget for a full production crew.
Video also opens new distribution channels. Post your video walkthroughs on YouTube, Instagram Reels, and TikTok to reach buyers who never visit the MLS. If you're building a social media page for leads, property videos give you consistent, high-quality content to post.
Wrapping Up
You don't need the most expensive camera or the fanciest editing software to shoot great listing photos. What matters is understanding light, composition, and staging well enough to present a property at its best.
Start with the basics covered in this guide. Invest in a wide-angle lens and a tripod. Shoot during golden hour. Declutter every room. Edit with a light touch. Avoid the common mistakes that make listings look like afterthoughts.
Then, when you're ready, carry those skills into video. The agents who combine strong photos with video walkthroughs in 2026 are the ones winning more listings and selling them faster. Your camera is one of the most powerful tools in your business. Learn to use it well.
Frequently Asked Questions
Do professional listing photos actually sell homes faster?
Yes. Redfin's own research found that professionally photographed listings sell up to 32% faster than those with amateur photos, and tend to attract higher offers too.
Why do listing photos matter so much?
Virtually every buyer uses the internet during their home search, so your photos are doing the heavy lifting before you ever shake a hand or open a front door.
What does this guide actually cover?
Equipment choices, editing, room-by-room strategies, and common mistakes, aimed at the photography tips that actually move the needle for listing photos.
 Hailey JeonMarketer, vProp13 min read